Getting perfect results when decorating your room requires preparation. Follow this guide to ensure you have all the tools and know how on achieving that perfect finish!
The most important step of all is to remove as much furniture as possible from your room to ensure you have access to every part of the room that you will be painting. Start by removing small items that can easily be moved and then move onto the larger items. Anything that you are unable to remove from the room, place into the centre and cover with dust sheets. Remember to remove any curtains, blinds, shelves or fittings.
Step 2 - Cleaning the Walls
Although the walls you are going to be painting may look clean, they have to be washed down to ensure there is no dust, grease or dirt hidden on the surface. Thoroughly dust the walls, coving, ceiling, skirting boards, door and window frames. Put your disposable gloves on and using a sponge, apply the sugar soap to the walls, working it into the surface to ensure the walls are completely clean. After leaving the sugar soap to soak in for a few minutes, fill your bucket with clean water and wipe the surfaces down with a clean damp cloth. Do not use too much water as you don’t want to soak the surface. Allow to dry.
Step 3 - Fill Cracks & Holes
For the smoothest finish to your freshly painted walls, you want to make sure any holes or cracks are completely filled. To begin, we have to make sure there is no loose plaster in each hole and crack. Using a small brush, use the bristles to remove any loose plaster. Slightly dampen the plaster in the crack/hole using a small paintbrush and water. This helps the filler to dry slowly preventing shrinkage. Take your filler and load it onto a filling knife or scraper. Scrape the filler into the cracks and holes ensuring the filler is pressed firmly into place. Let the filler dry completely.
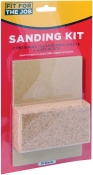
Step 4 - Sanding Walls
Once the filler is completely dry, you want to lightly sand the raised sections to ensure it is completely flush and smooth with the rest of the walls. Remember and use your dust mask and safety goggles! Use the sandpaper to continue sanding all the walls to ensure it is completely smooth and even. Once the walls are completely smooth, you need to thoroughly dust every surface in the room to ensure there is no sanded dust sticking to the surfaces. You should also vacuum the floor as the dust may rise and stick to your freshly painted walls!
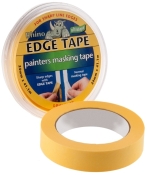
Step 5 - Final Preparations
You are nearly at the stages for putting your chosen paint to the walls! Before we pick up the paintbrush, we have to make sure our dust sheets cover any of the large furniture pieces we couldn’t move out of the room. You now want to mask any surfaces with masking tape that you will not be painting. Start with light switches, sockets, skirting boards, windows and door frames. Ensure the masking tape edge is flush with the surface you will be painting to create smooth, straight lines.
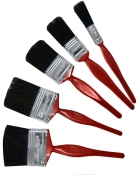
Step 6 - Painting
It’s finally time to paint the walls! Using a precision tip or angled brush, start by applying the paint to the surfaces that require precision, such as around coving, skirting boards, light switches, sockets, door and window frames etc. Using an angled brush will ensure a neater, straight line. Once these are done, you can paint the walls using either a roller or brush. Read the paint tins directions to follow their guidelines. Before the paint fully dries, remove the masking tape slowly at a 90° angle. If the newly painted edges begin to tear, very gently score the edge with a retractable knife. If further coats are required, go back to step 5 and repeat the process moving on to step 6 until no more coats are needed.
Step 7 - You are Finished!
Well nearly… Always remember to clean up your brushes, rollers, filling knifes and any other tools you may have used to make sure they are ready for your next DIY job! Once the walls are dry, bring in your furniture and enjoy your fresh new room!
Please note, the products advertised are available at the time of this post being published. However, the prices and stock availability may change at any given time. Please check with your local store to ensure they have stock available before making a long journey.
This website uses cookies to improve your experience while you navigate through the website. Out of these, the cookies that are categorized as necessary are stored on your browser as they are essential for the working of basic functionalities of the website. We also use third-party cookies that help us analyze and understand how you use this website. These cookies will be stored in your browser only with your consent. You also have the option to opt-out of these cookies. But opting out of some of these cookies may affect your browsing experience.
Necessary cookies are absolutely essential for the website to function properly. This category only includes cookies that ensures basic functionalities and security features of the website. These cookies do not store any personal information.
Any cookies that may not be particularly necessary for the website to function and is used specifically to collect user personal data via analytics, ads, other embedded contents are termed as non-necessary cookies. It is mandatory to procure user consent prior to running these cookies on your website.